Showing posts with label hobby master. Show all posts

Tuesday, July 6, 2021

4D Jeeps and M3A1 half-track

In this post, I present a couple more new offerings from 4D Models. The first model is a M3A1 half-tracked armored military vehicle (半履带武装甲车).


The 4D M3A1 is largely the same as their "M3" (M21) half-track, although parts for the mortar are not included, and the undercarriage is modified to accomodate an unditching roller.

There is a new sprue for a pulpit and roller, as well as an additional M2 machine gun. The model I have is molded in khaki drab, but similar to the M3 half-track, versions exist in both dark green and khaki drab plastic.


As with the earlier M3, the model goes together quickly and easily. The hardest part is to get the wheels onto the metal axles.

M3A1 vs M3 (M21)

Unlike the previous M3, the rudimentary M2 machine guns on the M3A1 do not come pre-painted.

The radiator louvres still look horrible

I think the roller may be a bit oversized, but the pulpit looks pretty good. Unfortunately, the interior still retains the M21 configuration, which would require more effort than it is worth to replace.


The other model is the Willy's Jeep off-road utility vehicle (威利斯吉普车 多用途越野用车).


The jeep comes molded in dark green or tan plastic, and includes a cargo trailer. I bought one of each color.


Unlike many other 4D models, the wheels are not painted to match the color of the plastic. The hubs are thick and bulky, presumably to allow the wheels to be firmly attached to the metal axles.


The model goes together fairly easily, but assembly took longer than for the M3A1 because of the delicate clean-up required for some of the smaller parts.

For one of the models, there was a molding issue that prevented the spare wheel from attaching properly. I ended up drilling out the hole, but the wheel still didn't fit well, so it's probably better to just file down the pin on the wheel and glue it in place.


The model doesn't look bad after being built up, but there is definitely room for improvement. The wheel hubs, windshield, steering wheel, and axe are all either too thick, or overly simplified. I etched a line on the axe to give it a bit of definition, but it was otherwise a featureless piece of flat plastic.


The windshield is a particular let down, since the design for the 1/48 scale 4D jeeps look so much better.


Compared to various other 1/72 scale jeeps, the 4D Models version is almost identical in size.

4D vs Hongwell

4D vs Marx

4D vs Hobby Master

4D vs Matchbox

The 4D jeep is probably closest to the Hobby Master jeep in dimensions, but, the wheelbase is closer to the Hongwell jeep. The Marx jeep is just as long as the 1/72 diecast jeeps, but not as wide. It almost looks closer in size to the 1/76 scale Matchbox jeep, but I think that is just because it doesn't have the spare tire and jerry can attached to the back.


I'm not sure if I will file down the windshield of the 4D jeeps to make them look better, but even if left as is, I think the models are more than adequate for gaming purposes.


Sunday, May 30, 2021

PSC German Medium Trucks (Part 2)


The second truck I built from the PSC German Medium Truck set was an Opel Blitz.


Assembly went pretty much the same as for the Mercedes-Benz from part 1, except the boxes on the underside of the truck bed can be left in place (since they seem to appear on some Opel trucks), and the front axle probably doesn't need to be cut down (although I actually shortened it a little).

Because I wanted to install the spare tire under the truck and have it be visible, I cut away the two front boxes under the bed, and scraped away some underside detail to allow the tire to fit in the center.


Unfortunately, I forgot to add the tire before gluing the bed to the undercarriage, and I could only slide it in halfway afterwards.


If I had scraped away more plastic earlier, I would have been able to slide it in, but now I need to come up with an alternative solution, like cutting the tire in half and then fitting the pieces in separately.

The PSC Opel Blitz (left) is very close to the Hobby Master model (right) in dimensions, although, the cab seems to be a bit longer, while the bed seem to be a bit shorter. The wheels of the PSC truck are a bit wider in diameter than those of the Hobby Master truck.


A comparison of the PSC, 4D, and Hobby Master trucks.


Overall, I think the PSC trucks are great as gaming models. They are a bit on the pricey side, but I'm not aware of any other quick build Kfz. 305s except the somewhat undersized trucks from 4D Models.


Tuesday, May 7, 2019

4D Quick Build Models

The latest 4D Models from China have entered the market, and they seem to be from the same company that did the 4D Assembly Models from my last post on 4D Models.


In this release, the models are labeled 快拼系列 (Kuaipin Xilie; Quick Build Series), with the M35 Cargo Truck (No. 1), and the BTR-80 APC (No. 2).

A build review in Mandarin Chinese on Jingmo Wusheng's Toy Sharing Channel (静默无声的玩具分享; Jingmo Wusheng de Wanju Fenxiang) at bilibili states the manufacturer is a company called "Lili" (but maybe he said 4D? I couldn't hear what he said clearly because of distortion in the audio).

I put the M35 together in 15 minutes or so. Half of that time was probably spent on scraping green paint from the tires (probably due to some issue with masking during production).

30 pieces

The suspension is very simplified.

There was a lot of play in the front wheels after assembly. Possibly because the axle was too long, but I think it is more an issue with the design since the front and back wheels seem to line up pretty well. Wusheng seemed to have even more of an issue in his build video, so I think that in some cases, it may be necessary to either file down the axle, or drill out the wheels.

On step 3, I placed the parts so that the ejection marks would be hidden from view. The illustration does not show it, but there is a perpendicular bar that should be on the side facing the rear of the cab.

Make ejection marks face direction of arrows

For step 5, the end of the exhaust stack should be rotated to angle away from the cab rather than point straight backward. Unfortunately, the ejection mark on the exhaust stack is on the outward facing side so it is quite visible.

Gas cap up, exhaust stack angles out

Also, when installing the fuel tank, make sure the gas cap is facing up. The illustration does not show any details, so the upward facing side might be mistaken for the underside of the fuel tank.

Compared to the Hobby Master M35, the trucks are identical in size and wheelbase.


I put the BTR together in about 15 minutes as well. I probably could have done it in 5 minutes, except I had to clean off a lot of flash. The 14.5 mm KPVT is thick and poorly shaped, while the handrails are thick and overscale. There is an extra handrail on the sprue in case you break or lose one.

26 pieces

For step 2, when viewing the parts from this inverted position, the coaxial gun should be on the opposite side.

Coaxial gun not visible from this side

The shovel and handrails had a bit of flash on them, and needed some clean up. It was fortunate that the parts are thick and made of ABS because I'm pretty sure I would have ended up with a lot of broken pieces if they were polystyrene.

horizontal bars should curve away from hull

When installing the handrails, make sure the horizontal bars are curved away from the hull of the vehicle. I may apply some ABS glue inside the hull later to make sure some of the looser fitting parts don't fall off.

Compared to the Trumpeter BTR-80, the two vehicles are almost identical in dimension. The wheelbase of the 4D model is a bit longer than the Trumpeter model (I think there is more separation between the front and rear pairs of axles on the 4D model), but it is not really noticeable without putting the wheels right up against each other.


All in all, I'm quite satisfied with the models. They are well suited for wargaming because of how robust they are, but they also have a lot of potential for modification (although the ABS plastic may be an issue).

A 6x6 Cougar MRAP appears to be available as well, but so far I have only seen it on Taobao.


In Wusong's review, he also mentions the manufacturer makes cannons and 1/72 figures. From what I can tell, the cannon is probably a Zvezda copy, while the figures seem to be Caesar copies.


Wednesday, April 25, 2018

PSC T-55


PSC released their first 1/72 modern tank model in the form of the T-55 as part of a "willstarter" pre-order program (200 pre-orders and they will produce the kit).

These are quick build models designed for wargaming, with three tanks in every box. Optional parts allow you to make the T-55 (Soviet or Polish), T-55A (Soviet, Czech, or Polish), or the T-55AM2.


The details on the parts are on the chunky side, giving the models a toyish look. Also, if you look closely at the parts, you can see layer lines, suggesting that the original pieces were probably created using 3D printing technology.

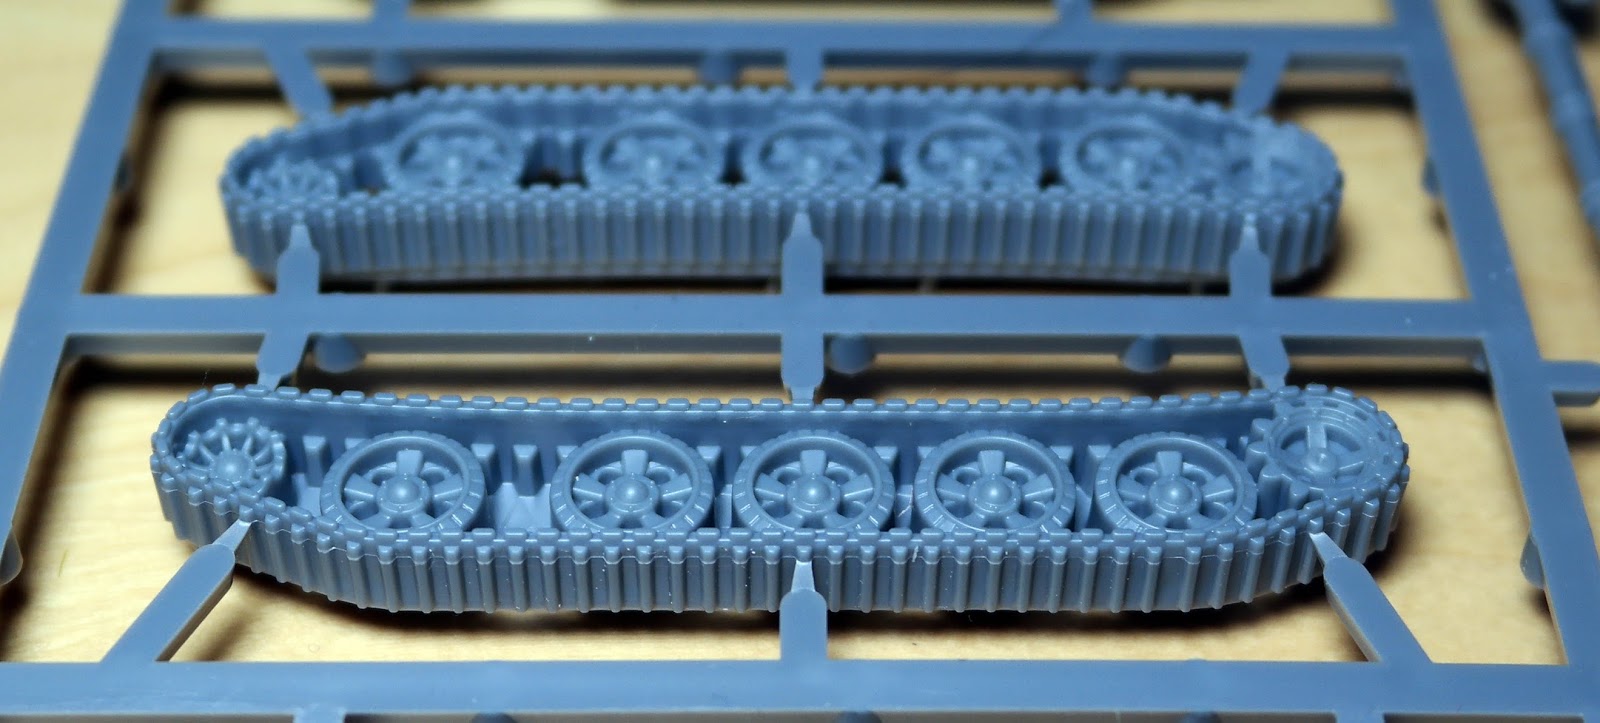
The tracks are pretty disappointing, and I'm not sure that there is any easy way to make them better looking. The rear drive sprockets also look to be somewhat oversized.


The turret is missing the ports for the coaxial machinegun and telescopic sight. There is also no IR searchlight for the commander's cupola (if anyone with the 15mm version of this kit wants to sell their extra searchlights, please contact me - I think they might work perfectly as the commander's searchlight in 1/72).


The rivets on the cupolas are enormous, and the DShK is very chunky. I also don't think that the T-55A loader's hatch is correct for the Czech version. In most of the pictures that I found, the hatch was more like the one designated for the T-55 in the instructions.


The loader's hatch cover also seemed to be rather unusual, being particularly thick, and with a lip around the edge.


The round shape seems okay, but most pictures seem to show that the cover is either flat or slightly domed.

For some tanks, the cover was also more "D" shaped, but there was no option for this type of hatch cover in the kit. Since my plan was to build a T-55A of the Sri Lanka Armoured Corps, I decided to start off by modifying the loader's hatch cover to reflect this appearance. I used a circle template and etched an arc with my scribing tool.


The arc should have been wider, so I had to file it down to a flatter shape after I cut the cover in two. I also thinned the plastic down a bit, though it's probably still too thick.


After that, I assembled all the major parts of the tank (which probably took less than 10 minutes), then took some comparison shots with a Hobby Master T-55A (HG3315).


As far as the two tanks compare, the hull of the Hobby Master tank is about 1mm wider, but they are pretty much the same length. The PSC tank actually looks shorter, but this is due to the turret being set further back on the hull so that the barrel of the cannon is 2mm further back.

The Hobby Master tank has a rounder turret, while the PSC tank has a more egg-shaped turret. I do not know which one is more accurate.

Despite the various deficiencies that I mentioned earlier, I still think the PSC models are well worth getting. They are sturdy models that are great for wargaming, and definitely look the part of a T-55. There are a lot of spare parts, and the D10T barrel is particularly nice (it really comes in handy if you have any Ace T54/T55/Type59 models with their poorly shaped guns).